this A2 I love!
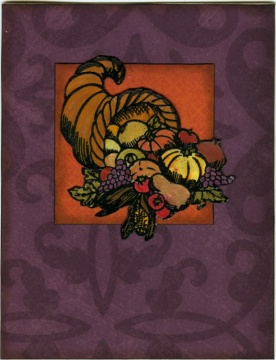
Some days I swear I need to be smacked upside the head. After all my gushing about how much I love the faster, simpler, easier style of CTMH, I went upstairs to play…and this stamped/embossed/colored cornucopia was still in my work space waiting on a card. I’m stubborn, and am still determined to make some A2 cards to go in those orange envelopes, so I dig around and find my CTMH Originals Programs. These are the best kept secret of (and the most valuable thing I own from) CTMH. So, I turn to the A2 size section, and almost every card sample could have been used with this stamped image…but I chose “Simple Solo” because I love how it showed the image slightly coming out of the square. To me that was significant for a cornucopia b/c my blessings run over…Get it?
The Originals Card Confidence Programs (p. 16) are three sets of sketch pages that go together to form a book. Like the Cherish and Imagine scrapbook layout books, they have a sketch, a finished sample, and a step by step guide to make perfectly balanced cards. They have 4.5×5.5, 3×3, 6×6, 5×7, and 8×3.5 sizes to choose from and they are SO FREAKIN’ EASY!
Once I chose the card to go by it was as easy as cutting my background paper to A2 size, cutting my focal square to the size designated, and gluing it all together. Using coordinating papers from my Enchanted Level 2 Paper Packet (p. 27) I did sponge some Desert Sand on the edges of both patterned papers with my sponge daubers (p. 101)…b/c to me a card needs those little extra touches. The card took all of maybe a minute to make since the stamped image was already done. I also barely edged my papers with my black Sharpie but there’s more on that below.
It looks exactly the way I wanted: simple yet classy. It suits the shine of the heat embossing that the Basic Grey papers in the post before last did not. Although I love those Basic Grey papers, I love this card a whole lot more than the other one. Don’t you?! I’m not sure why I don’t do this all the time. It would save me so much grief.
Something I learned from a stamp store in New Mexico my very first year of stamping: Stamp it, heat emboss it in black, and color it in with markers. It will make your card look like a million bucks every single time. It’s my secret trademark…it’s why my cards look so good in real life…it’s why I have to make so many cards for Christmas every year, lol. When you are coloring it in with markers (I use my CTMH markers – no fancy art markers) be sure to color it lightly the first time. Then after all the image is colored in, go back with those same color markers and color parts of it again to make them a little darker. To make it really POP, cut out around the image and color each edge with a black Sharpie marker. This not only makes it look more finished, it covers up any goofs you made when cutting.
I learned a lesson from myself today. Instead of trying to strain my brain coming up with fab cards to show, I can use my CTMH tools (like the Originals Programs) and let the thinking already be done for me. Then I can spend more time doing other things, like blogging 😉
Oh, and the cornucopia stamp is from the Give Thanks set (p. 62). It’s retiring so be sure to get it before Dec. 31. If you need a CTMH Idea Book (catalog), just comment me with your address and I’ll mail you one for free.


Morning, Mary!
I have to admit, I like both cards…I really like ‘busy-ness’ of the Basic Grey card but I see what you mean about the cornucopia really ‘popping’ in the CTMH card. Since you offered…I need help with my Christmas cards this year…I’m really torn on what I want to do, any additional ideas I can get will help!
Thanks for your inspiration!
Tara